
Running Windows 11 VMs in Minutes with Quickemu
Microsoft now forces a Microsoft account for Windows evaluation VMs. Quickemu on Linux lets you create a clean local-account Win11 VM in minutes with TPM 2.0, Secure Boot, VirtIO drivers & great performance. Perfect for testing scripts, GPO, Intune or security tools.
If you are a pure developer Docker probably covers all your infrastructure needs. However if you are working with DevOps, pure Ops, DevSec or pure Sec you will need test-infrastructure for those infrastructure as code scripts and victim servers. Personally I prefer to do that locally, setting up, hardening and hacking my own infrastructure.
One of many tools in that regard is Quickemu.
Running Windows 11 VMs in Minutes with Quickemu + QEMU
A perfect disposable test environment for configuration management scripts on Windows workstations
In the past, Microsoft made life easy for developers and IT pros. They offered free, pre-installed Windows virtual machines (Windows 10 and early Windows 11 evaluation images) that you could download and run for up to 90 days. These ready-made test boxes were perfect for quickly trying out scripts, Group Policy settings, or configuration management tools without any setup hassle.
These days, Microsoft has removed easy access to those ready-made VMs. They have also made the out-of-box experience (OOBE) much stricter. It now forces a Microsoft account sign-in and hides the local account options. But the good news is that it is still completely possible to create a clean, local-account Windows 11 test environment in minutes.
The tool that makes this painless on Linux is Quickemu, a lightweight wrapper around QEMU that uses the host’s native KVM virtualization. Unlike VirtualBox, it requires no extra kernel modules to install or rebuild.
1. Install Quickemu & Prepare the infrastructure
cd ~/Downloads
VERSION=$(curl -s https://api.github.com/repos/quickemu-project/quickemu/releases/latest | grep '"tag_name"' | cut -d '"' -f 4)
wget https://github.com/quickemu-project/quickemu/releases/download/${VERSION}/quickemu_${VERSION}-1_all.deb
sudo apt install ./quickemu_${VERSION}-1_all.deb
Quickemu automatically installs QEMU, OVMF (EFI), Spice, VirGL acceleration, and everything else you need.
We also need a good folder structure. I usually save my virtual machines in ~/VMs, so I am going to use that here.
cd ~
mkdir -p ~/VMs/isos
mkdir -p ~/VMs/ubuntu-easy-showcase
mkdir -p ~/VMs/windows
cd ~/VMs/ubuntu-easy-showcase
Manually download Windows 11
At the time of writing there was considerable hassle with the quickget auto-download of the Windows 11 desktop, so this part of the installation has to be done manually.
Download your Windows 11 iso from:
https://www.microsoft.com/en-us/software-download/windows11
and move the downloaded iso from the Downloads folder to the isos folder:
# Moving my Norwegian language Windows 11 iso to the proper folder
mv ~/Downloads/Win11_25H2_Norwegian_x64_v2.iso ~/VMs/isos/
Quick host prerequisites (one-time only)
Before your first VM, make sure KVM works on your Linux host:
# Check that virtualization is enabled in BIOS
kvm-ok

# Add yourself to the kvm group (required for non-root access)
sudo usermod -aG kvm $USER

# Log out and back in (or reboot) so the group change takes effect

Gold Standard Usage - Create Ubuntu 26.04

Just so I showcase just how easy life can be with QEMU and Quickemu I will quickly show setting up a Linux distro, before we dive into the murky world of Microsoft Windows.
# 1. ONE command does everything (downloads latest Ubuntu + creates perfect config)
quickget ubuntu 26.04 # available at the end of April 2026, use 24.04 if it is not ready yet
Quickget will automatically:
- Download the current Ubuntu ISO (in April 2026 this will be 26.04 or the latest LTS)
- Create a ready-to-run .conf file with VirGL acceleration, VirtIO drivers, Spice, etc
# 2. Launch it
quickemu --vm ubuntu-*.conf
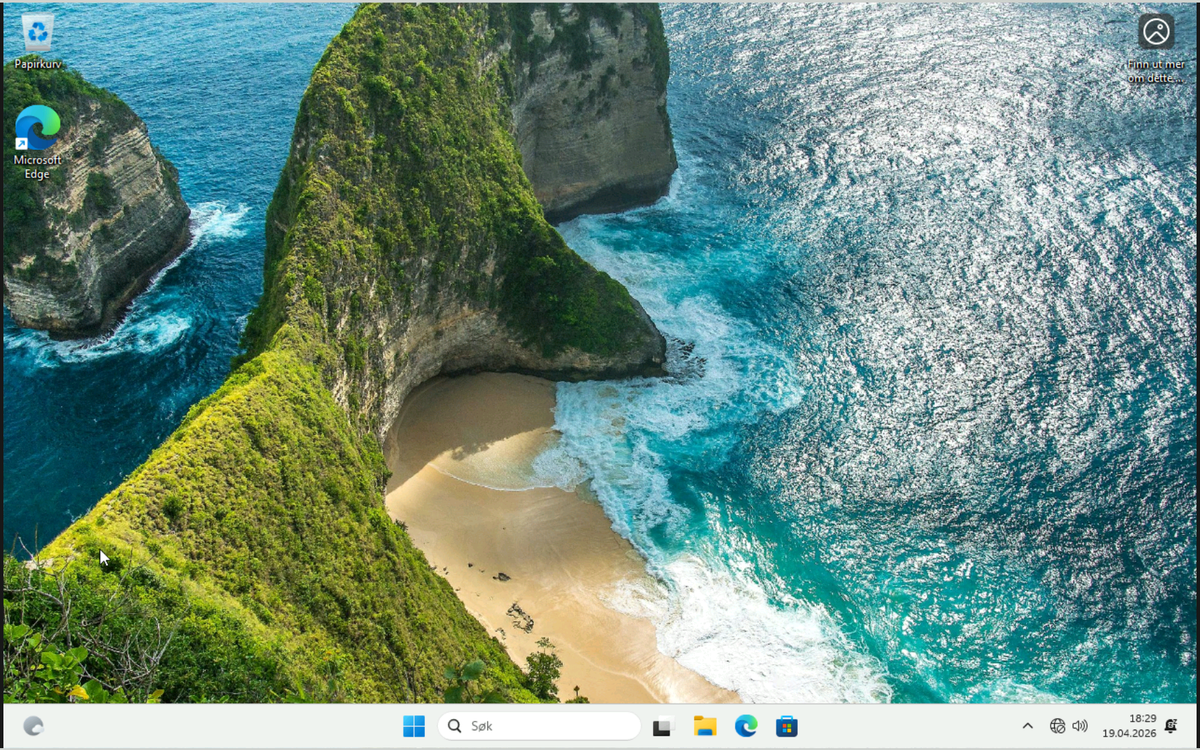
What happens next (the part that shames Microsoft):
- The VM boots straight into a beautiful, fully functional Ubuntu live desktop (smooth graphics, copy-paste works instantly).
- Double-click the “Install Ubuntu” icon on the desktop.
- A few ridiculously simple clicks:
- Language & keyboard
- Updates & software (normal or minimal)
- Erase disk & install Ubuntu
- Create a local account (username + password , there is no Microsoft forced online account nonsense here)
- Done
That’s it. You have a clean, fully installed Ubuntu desktop in under an hour total. No product keys, no telemetry opt-outs you have to hunt for, no TPM/Secure Boot drama.
2. Create the Windows 11 VM
Snap back to reality: Many corporations are heavy users of Windows, and in pentesting the Windows workstation is the target you want to practice on.
While Quickget streamlines the whole process for Linux distributions, with one command downloading the ISO and creating a ready-to-run config, on Windows, however, you still need more manual steps: downloading the official ISO from Microsoft (completed above) and running the installer.
cd ~/VMs/windows

quickget --create-config windows ~/VMs/isos/Win11_25H2_Norwegian_x64_v2.iso
This creates windows.conf and a 16 GB qcow2 disk.
Make sure that the Windows iso file remains in the isos folder. The above command can move it to the windows subfolder of the windows folder (~/VMs/windows/windows), and if it is there move it back to the ~/VMs/isos folder.
3. Download VirtIO drivers & tune the config
wget -4 -O ~/VMs/isos/virtio-win.iso https://fedorapeople.org/groups/virt/virtio-win/direct-downloads/stable-virtio/virtio-win.isoEdit the config:
nano windows.conf
Make sure that the new config in windows.conf is similar to this:
#!/usr/bin/quickemu --vm

# ==================== BASIC SETTINGS ====================
guest_os="windows"
disk_img="windows/disk.qcow2"

# ==================== ISO PATHS (absolute = no moving) ====================
iso="/home/loki/VMs/isos/Win11_25H2_Norwegian_x64_v2.iso"
fixed_iso="/home/loki/VMs/isos/virtio-win.iso"

# ==================== WINDOWS 11 REQUIRED SETTINGS ====================
tpm="on"
secureboot="on"

# ==================== PERFORMANCE ====================
cpu_cores="4"
ram="8G"

# ==================== NICE-TO-HAVE ====================
display="gtk"
sound_card="intel-hda"
Save and exit.
NOTE: quickget --create-config with the Windows ISO in ~/VMs/isos/ may not set the iso= line correctly in windows.conf (known minor quirk in quickget).
So make sure that the iso line points to the correct folder.
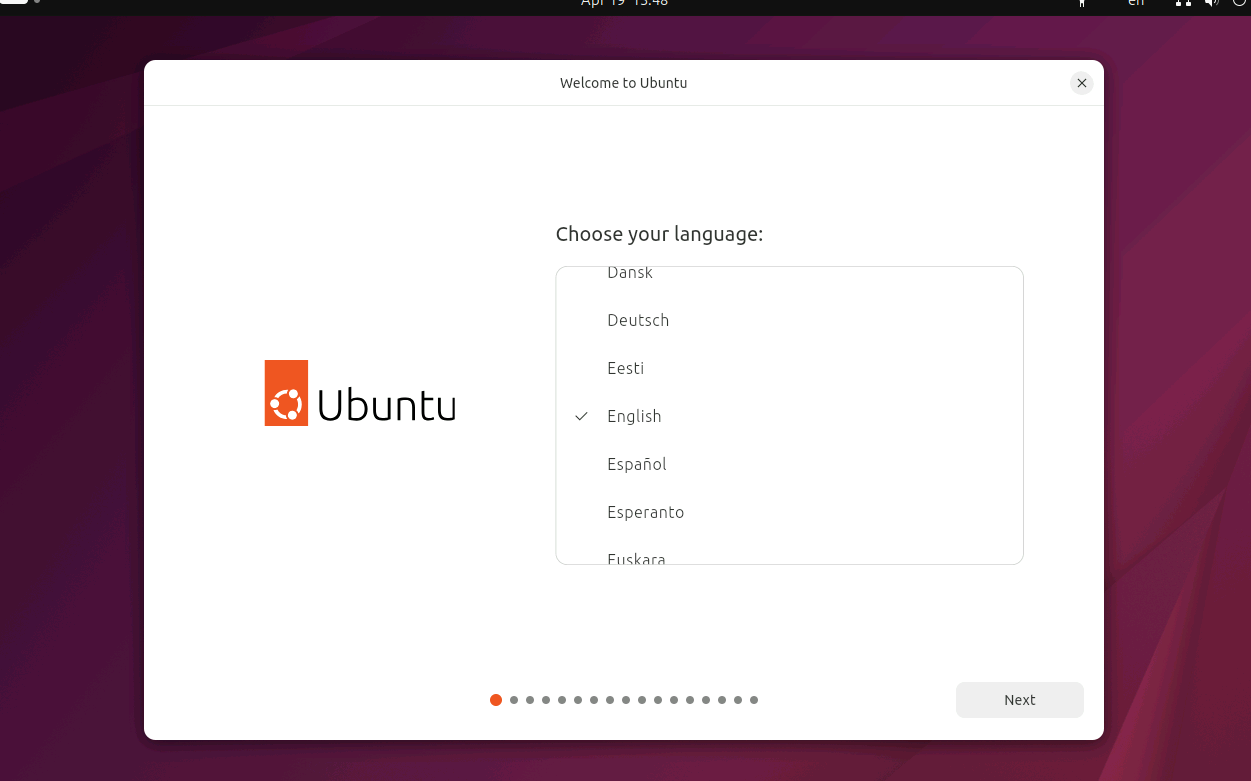
4. First boot & installation
# First delete the OVMF_VARS.fd file before first boot
rm ~/VMs/windows/OVMF_VARS.fd

# First boot of the Windows 11 virtual machine
quickemu --vm windows.conf
During Windows Setup:
- Click "I don't have a product key" when you are prompted for one.
- At the disk selection screen, the virtual disk won’t appear yet.
- Click Load driver → Browse.
- Select the VirtIO CD drive →
viostor→w11→amd64. - Select any
.inffile (e.g.viostor.inf) → Install. - Your disk now appears. Select it and continue.
The rest of the installation runs unattended.
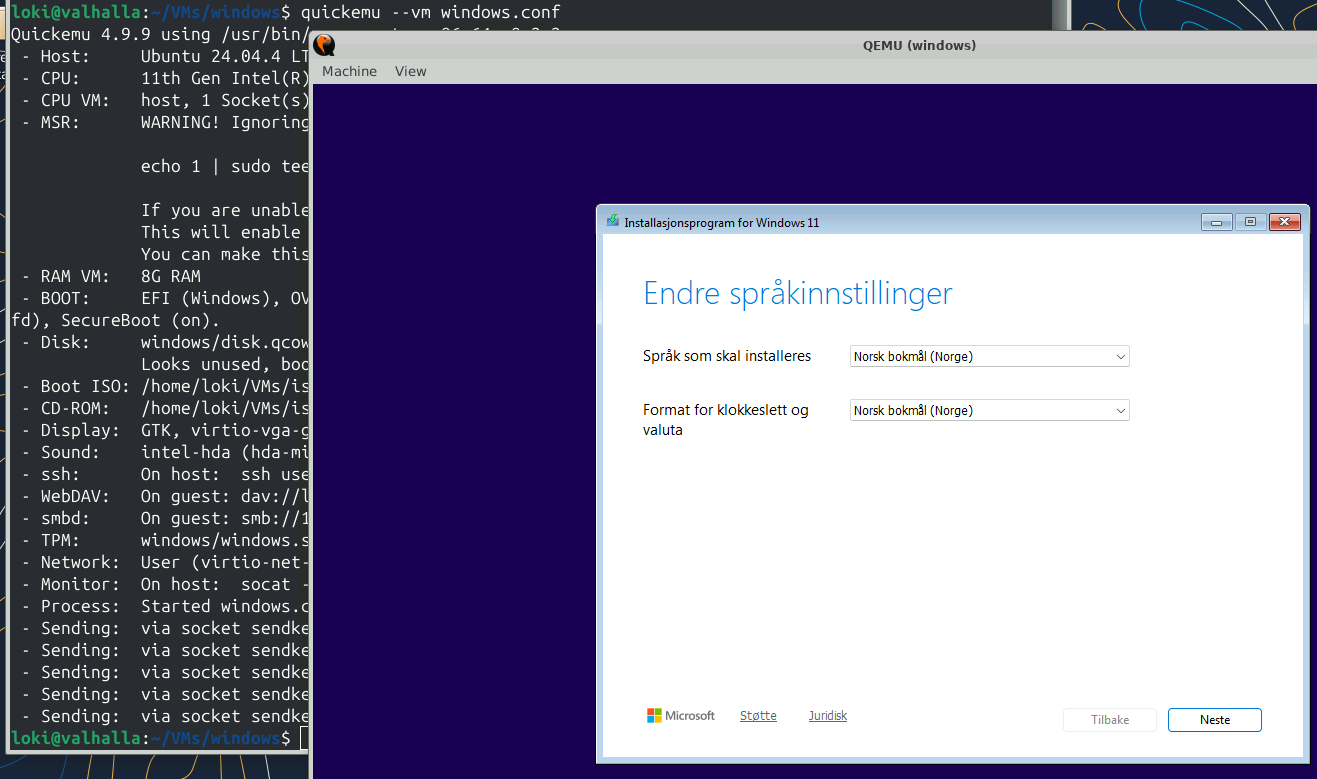

On the install driver screen, click the "Install driver" button, select the virtio CD ROM, then select:
NetKVM -> w11 -> amd64.
You will now be connected to the wifi.
5. Bypass Microsoft account (OOBE) – April 2026 method
At the "Connect to wifi" or “Unlock the Microsoft experience” screen:
- Press Shift + F10 to open Command Promp and type the content in noted below.
- Close the command window.
- Click “I don’t have internet”.
- Windows immediately offers to create a local account.
Type:
start ms-cxh:localonly # create the local user

# You might have to release the NIC (wifi card), if MS forces you to log onto an online account

ipconfig /release
and press Enter.
When tested in mid-april 2026, this method worked even if you ran it as late as the "Log on to your Microsoft account"-screen.
Choose a username (e.g. tester), optional password, and click through. Decline telemetry/privacy prompts as desired.
Final Tips for a Production-Grade Test VM
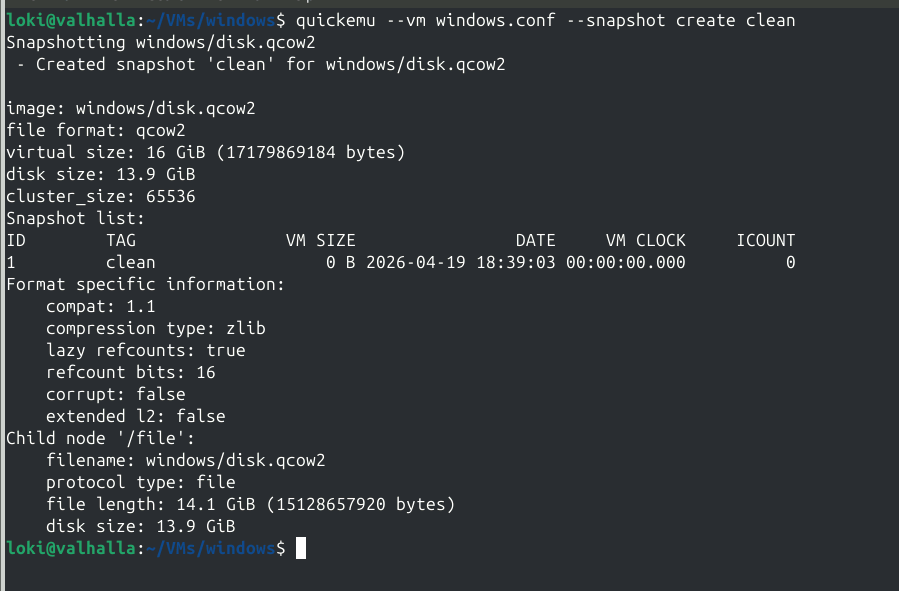
After the first successful boot, reboot once from inside Windows (networking becomes rock-solid). You can now create snapshots (quickemu --vm windows.conf --snapshot create clean), enable shared folders, and delete the entire VM in seconds when you want a fresh Windows 11.
6. Permanent TPM 2.0 + Secure Boot
Because we enabled tpm="yes" and secureboot="on" before the first boot (and deleted the old EFI vars with rm windows/OVMF_VARS.fd), Windows 11 now sees real TPM 2.0 and Secure Boot on every launch.
Why this setup is perfect for configuration management (or security) testing
- Blazing fast: VirGL + GTK/SPICE gives smooth graphics and seamless copy-paste.
- Disposable and reproducible: Delete the qcow2 file and you have a fresh Windows 11 in minutes.
- Snapshots:
quickemu --vm windows.conf --snapshot create cleanand restore instantly. - Built-in networking: SSH on port 22220, shared folders via WebDAV/SMB.
- Low overhead: Runs great even on a laptop.
You now have a clean, realistic Windows 11 workstation environment ready for various testing, Ansible playbooks, PowerShell DSC, Intune policies, or any config management work. All from your Linux desktop.
All it takes is one tool, one config file, and one command to get going.
That is what makes Quickemu so great. No heavy GUIs, no license keys, and no long wizards to slog through.